
GC-5x replace

Question
I would like to update GC-53LCx (53LMx / 55EMx / 56LCx).
Please tell me the successor model and update procedure when updating to the current product.

Answer
Successor model: Orders for the GC-A2 Series will end at the end of June 2025.
We regret to inform you that there is no successor model.
Please note that the following explanation is intended for customers who have the GC-A2 Series as a spare part.
The GC-53 series is currently being replaced by the GC-A24-RS, but it is not a fully compatible product.
(GC-55 / GC-56 series is for GC-A26)
In addition, F/W Ver0.1.1.0 Build01 or later (produced after January 2021), GC-7x compatibility mode with improved compatibility with the old series is now available.
The project migration procedure when using this is as follows.
For details, please read the explanation below from the model number comparison table.
– Notes –
2. If there is no editable screen data in the project uploaded from the display unit, if you are using a device/PLC that is not compatible with the GC-70 series, or if the connection method is not compatible (M:N communication). If you are using , it cannot be replaced.
3.Your connected device (PLC) is Please check if it is listed in “Vol_8_2_SCA2_SCREEN CREATOER 5” posted here.
4.A USB memory or SD card is required to download the project to the GC-A2x series.
5.The GC-50 series has a DSUB 9-pin (female) serial communication port connector, while the GC-A2 series has a DSUB 15-pin (male). If you want to use the cable used for the GC-50 as it is, create a connector conversion cable. For the conversion cable, see here.
6.If you are using K-BASIC to control the screen, the switching speed may be slow. Please use the parts of Screen Creator Advance2 instead.
7.If you are making a push button SW using texture parts, the response speed of button operations may be slow. Please delete the texture before use.
8.In addition, HMI restrictions will occur due to changes in screen resolution.
Model number comparison table
| GC-50 | Successor GC-A2 | screen size | External dimensions | Panel cut out |
|---|---|---|---|---|
| GC-53LM | GC-A24-RS *1 | 7.0 inch wide 800×480 (WVGA) | GC-53: 197.0Wx152.0Hx47.0D GC-A2: 204.4Wx156.0Hx54.6D |
No change |
| GC-53LM2 | ||||
| GC-53LM3 | ||||
| GC-53LC | ||||
| GC-53LC2 | ||||
| GC-53LC3 | ||||
| GC-55EM *1 | GC-A26 | 10.4 inches 800×600(SVGA) | GC-55:296.0Wx202.0Hx77.5D GC-A2:299.0Wx209.0Hx70.0D |
no change |
| GC-55EM2 | ||||
| GC-56LC *2 | GC-56:296.0Wx209.0Hx77.5D GC-A2:299.0Wx209.0Hx70.0D |
no change | ||
| GC-56LC2 |
*1: Screen size/resolution and external dimensions are different.
*2: Screen resolution and external dimensions are different.
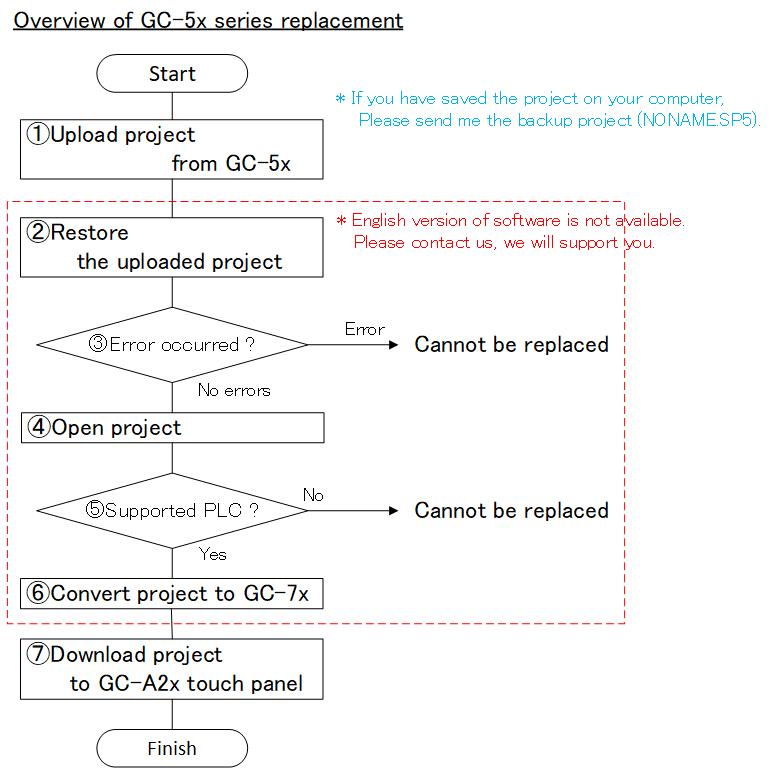
Replacement procedure
If the GC-50 project is saved on your computer
2.Go to “Project”->”Open” from the SC5 menu and open the project.
3.Go to “Project”->”Backup” from the SC5 menu and make the back up file.
* If successful, a file named “NONAME.AP5” will be created in folder “PA_UPX” of the folder where SC5 is installed. (exp : C:\SC5\PA_UPX)
4.Please send me “NONAME.AP5”. We will convert the project and send you the converted project.
If the GC-50 project is not saved on your computer
2.Download SC5 from here and unzip it.
* Execute “PA.exe” in the unzipped folder to start SC5.
3.Attach a commercially available USB/serial converter to your computer and set it to either COM1 to COM4.
* For COM port settings, see here. Please give me.
4.Please connect PC and GC-50 with GC-S1C1-DEE download cable.
* Click here for the down cable connection diagram Please take a look.
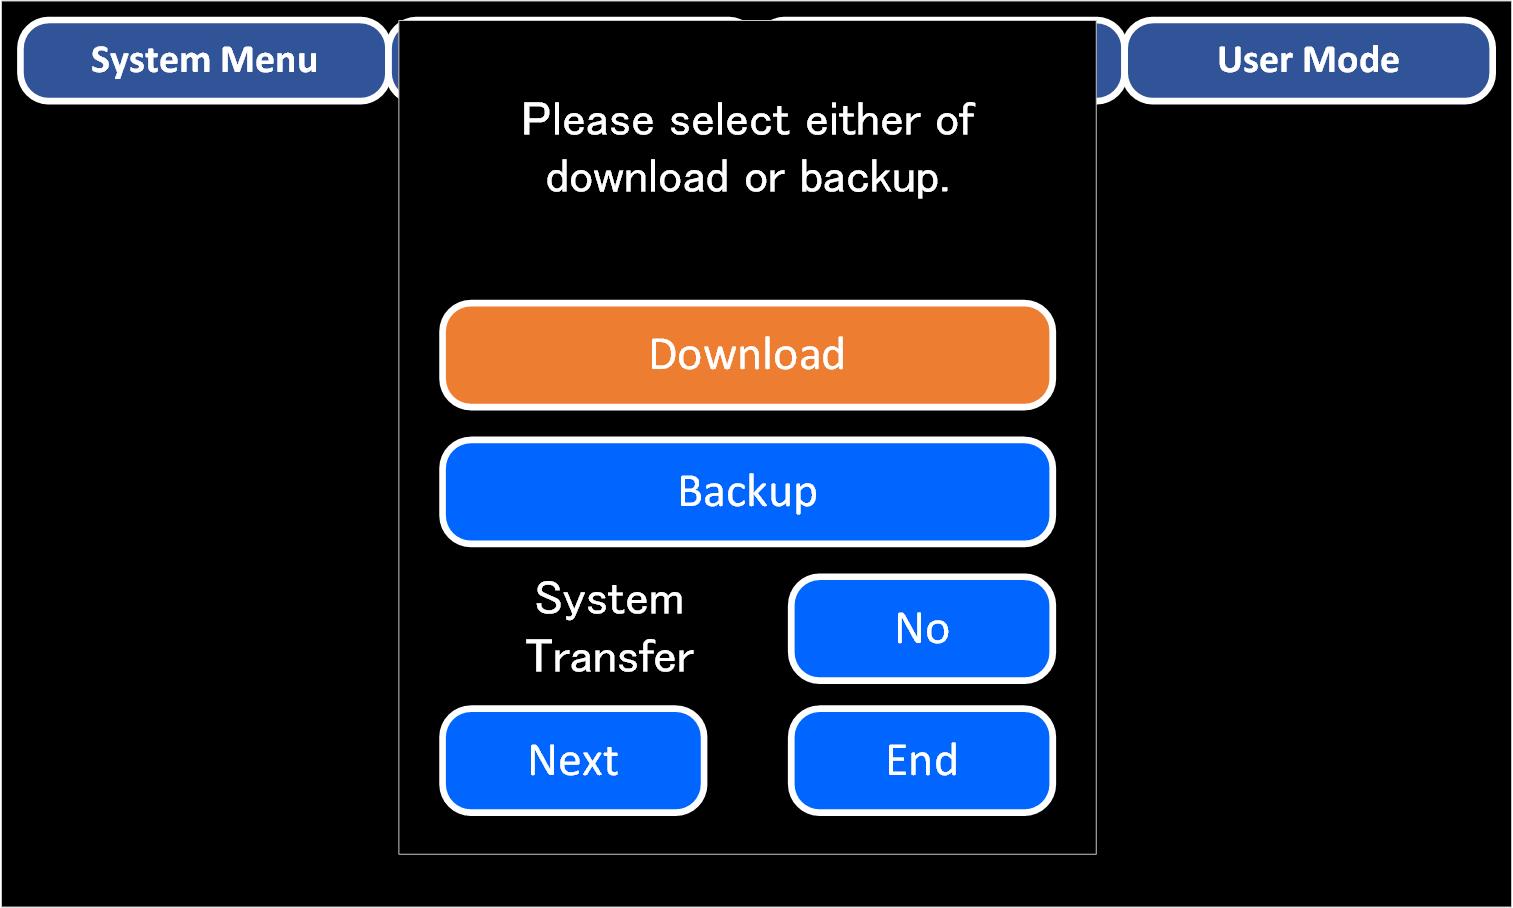
5.Touch the upper left and lower right of the GC-50 screen at the same time to switch to the system screen.
6.Touch “Download” to put the GC-50 in the download waiting state.
7.Start SC5.
8.Go to “Project”->”Upload”->”Upload” from the SC5 menu and make the back up file.
9.Select the model number in “Panel”.
10.Select the COM port number and communication speed of the PC to which the display is connected in “Transfer method”.
11.Uncheck “Copy from CF card” and press “OK”.
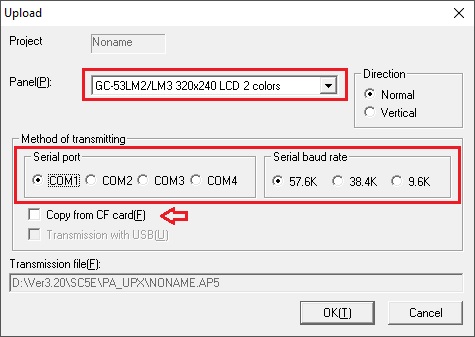
* If successful, a file named “NONAME.AP5” will be created in folder “PA_UPX” of the folder where SC5 is installed. (exp : C:\SC5\PA_UPX)
12.Please send me “NONAME.AP5”. We will convert the project and send you the converted project.
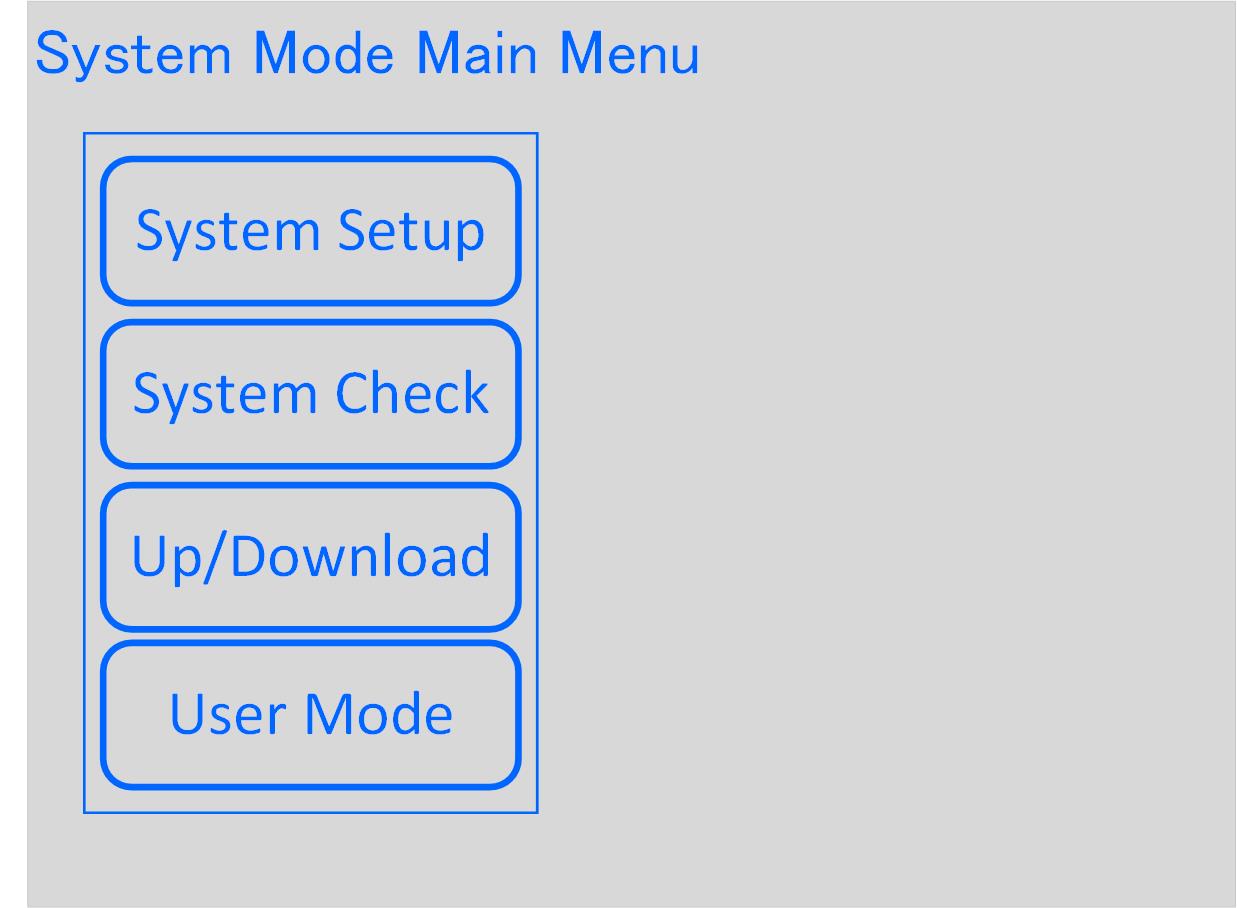
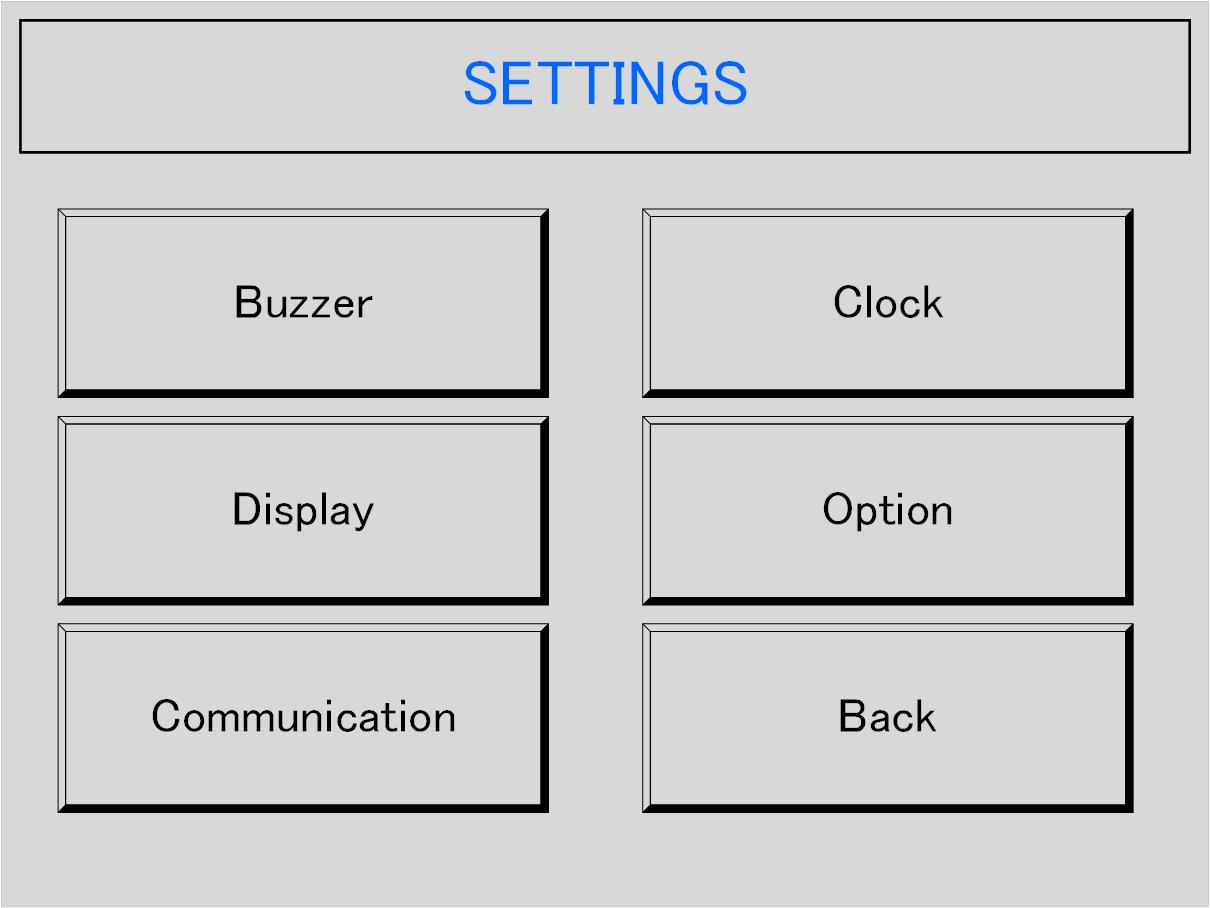
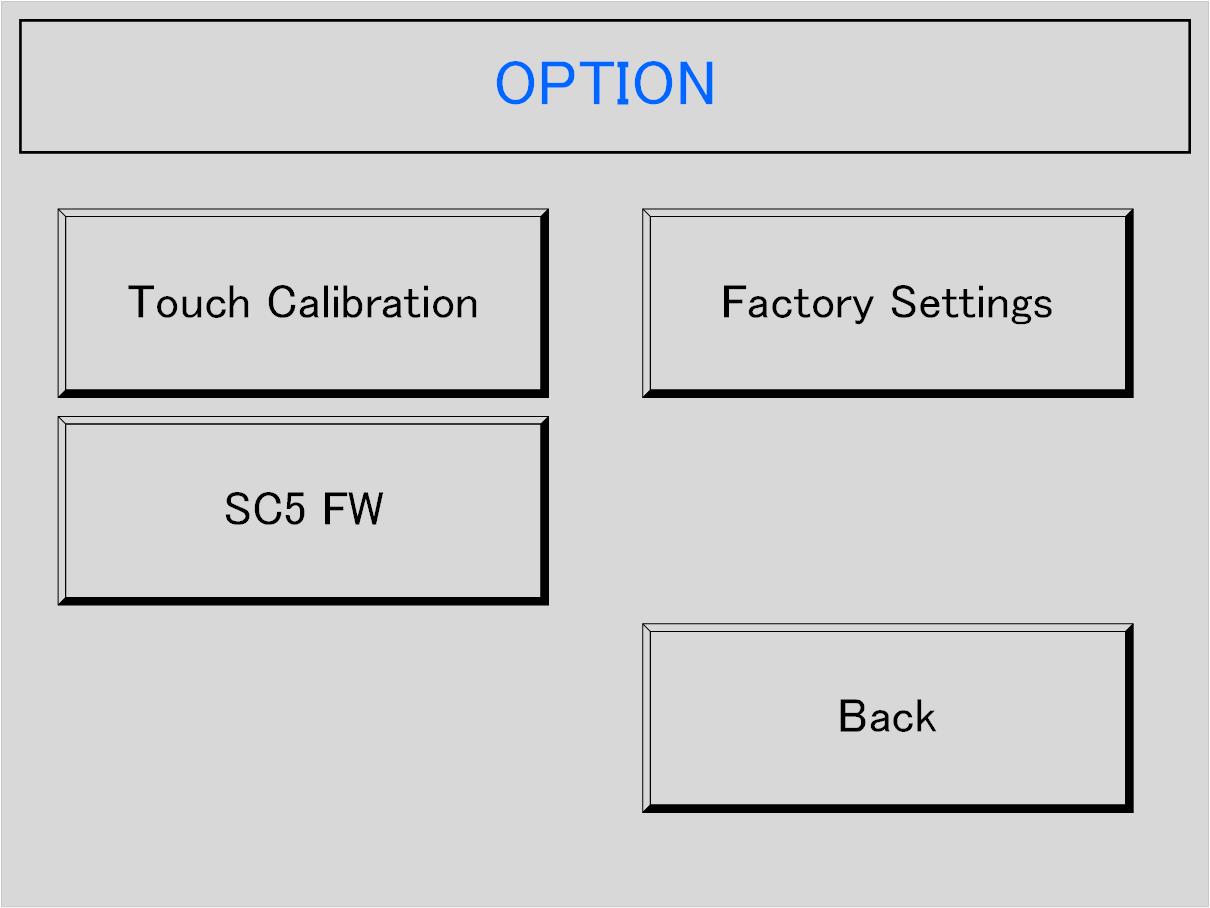
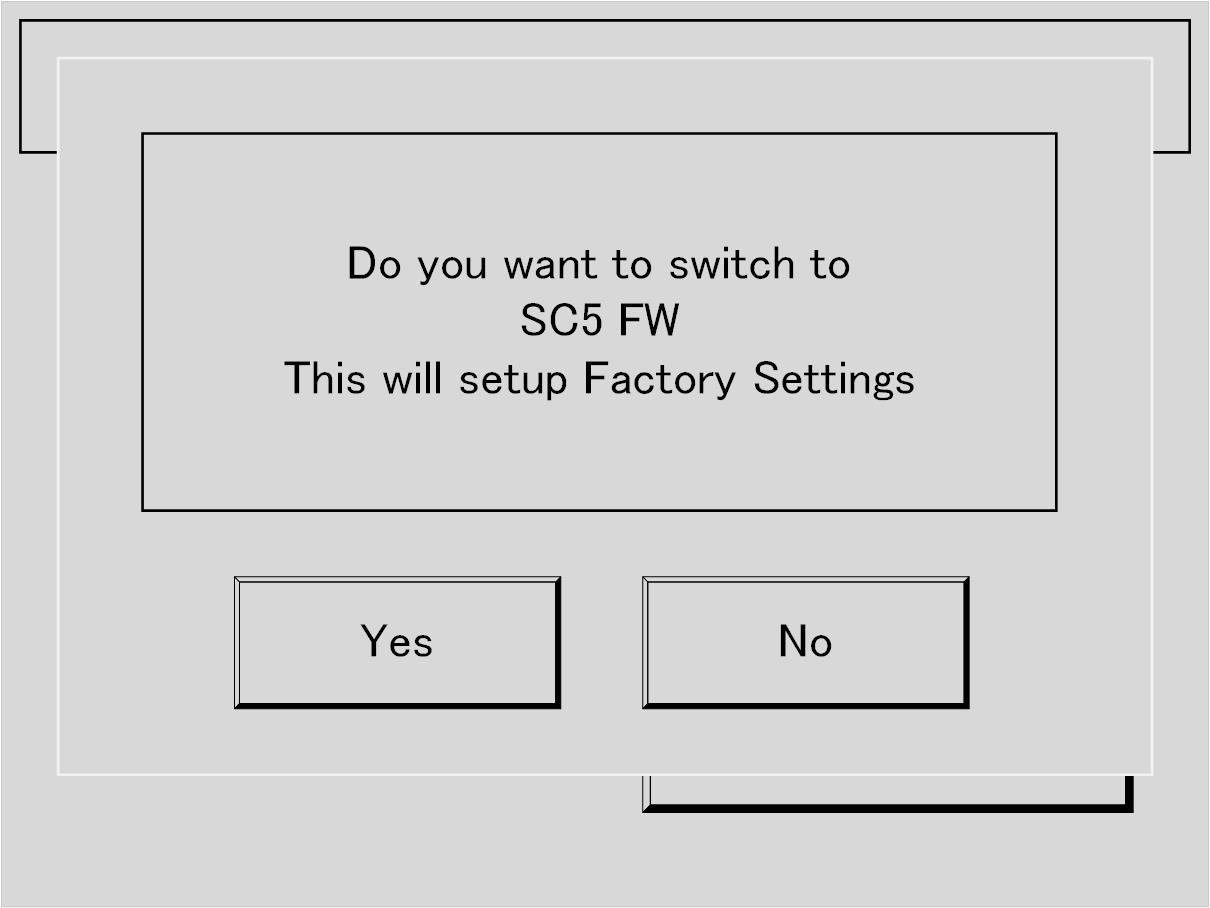
Switch the GC-A2 firmware to “SC5 mode”
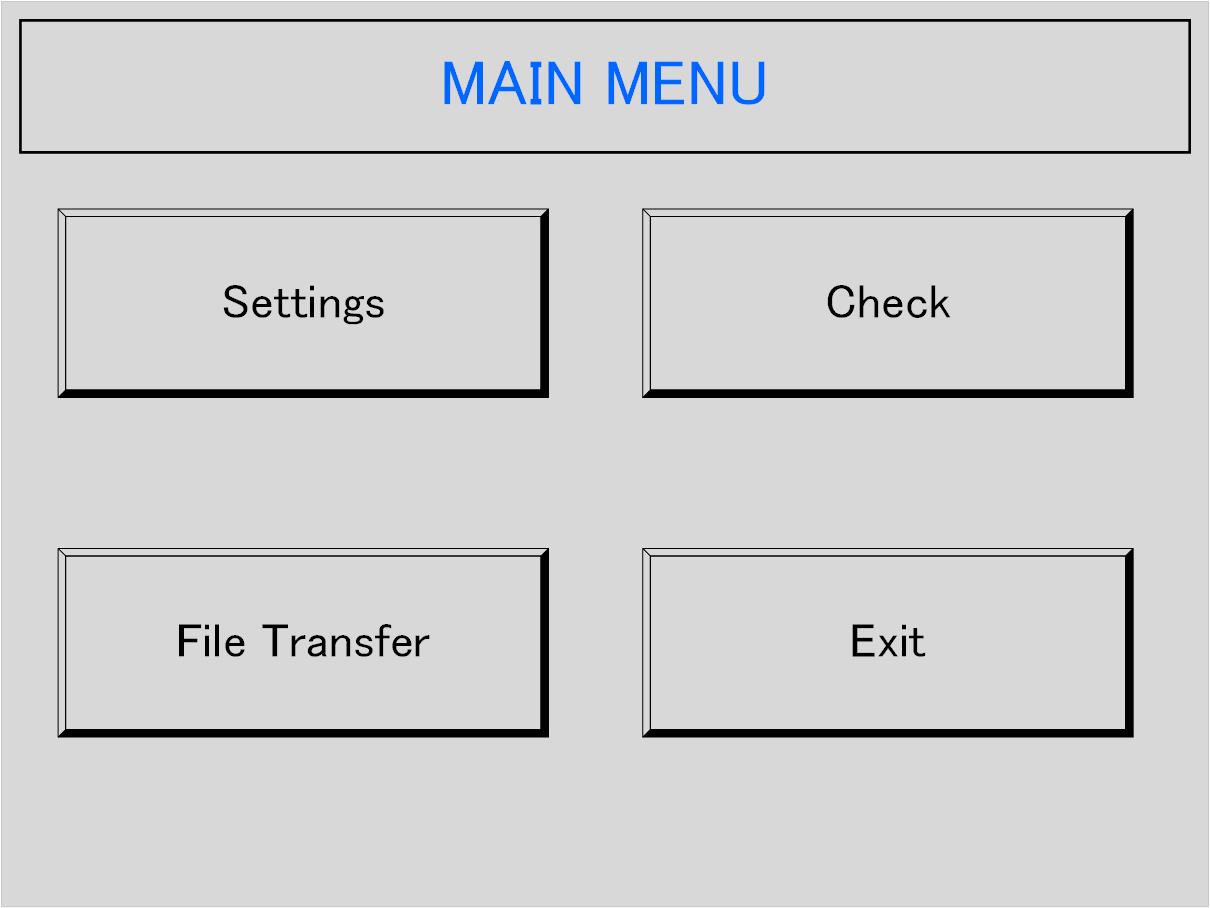
2.Touch “Settings”-> “Option”-> “SC5FW”-> “yes” to restart the GC-A2 display as a GC-70 equivalent.
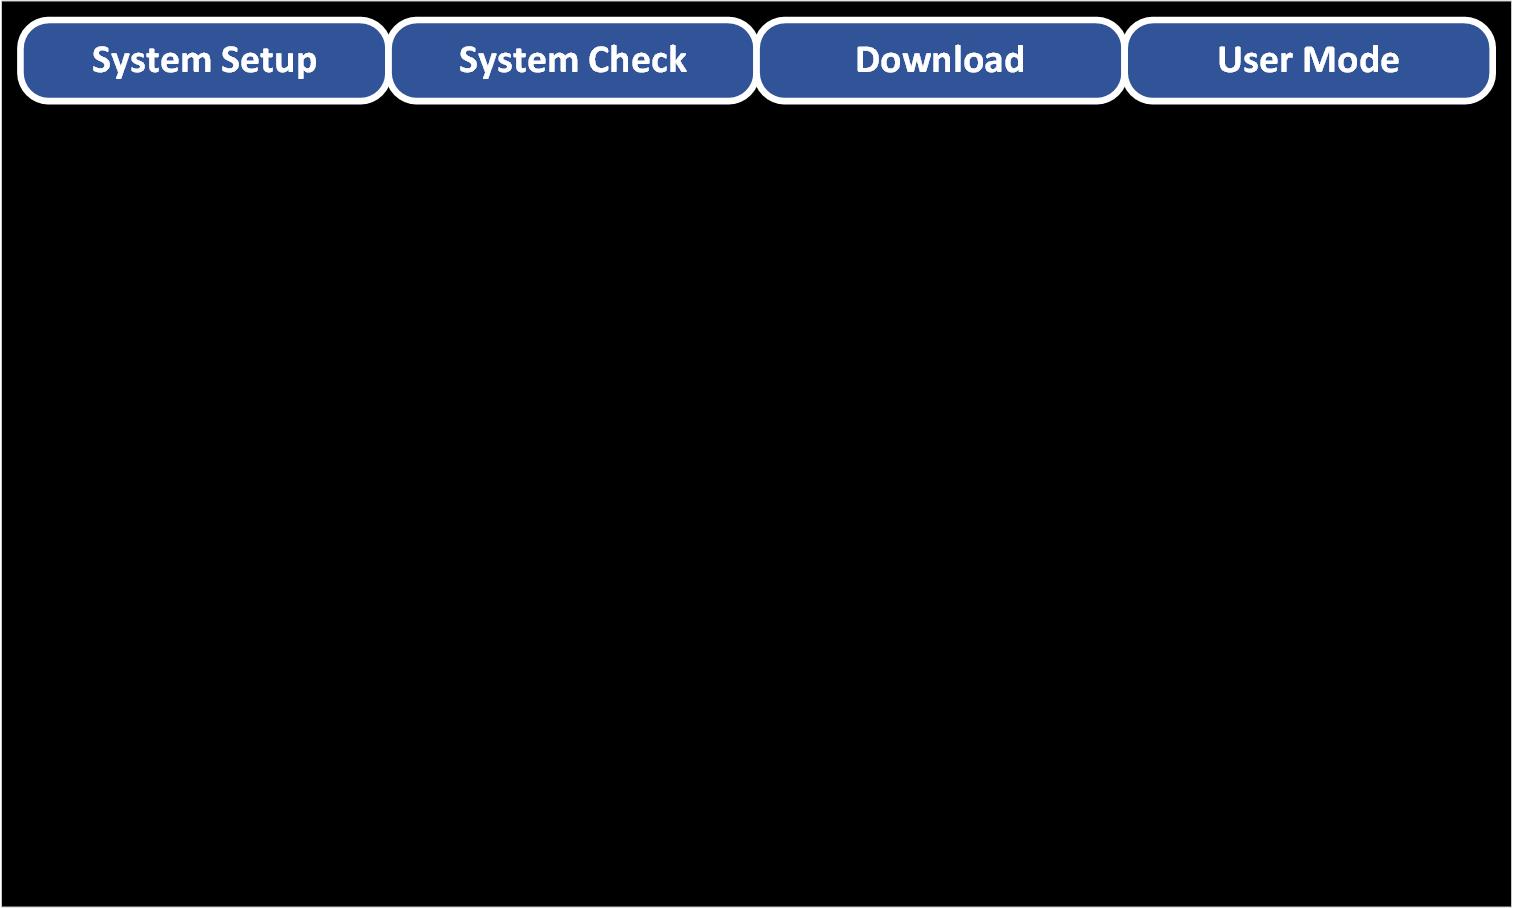
Switch language to English”
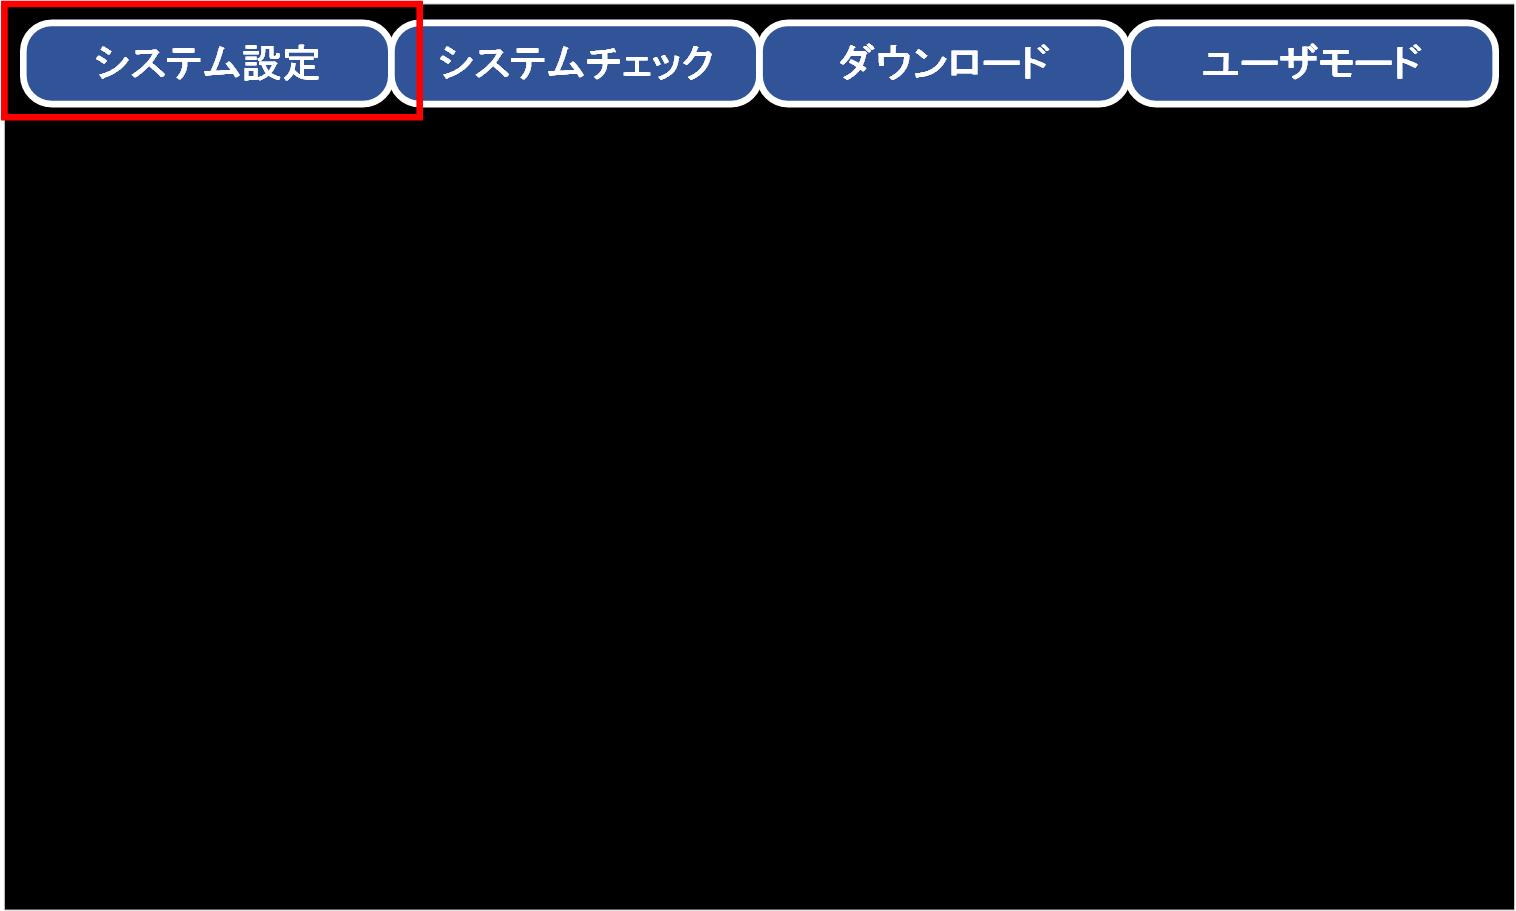
2.Touch the red square button in the system menu.
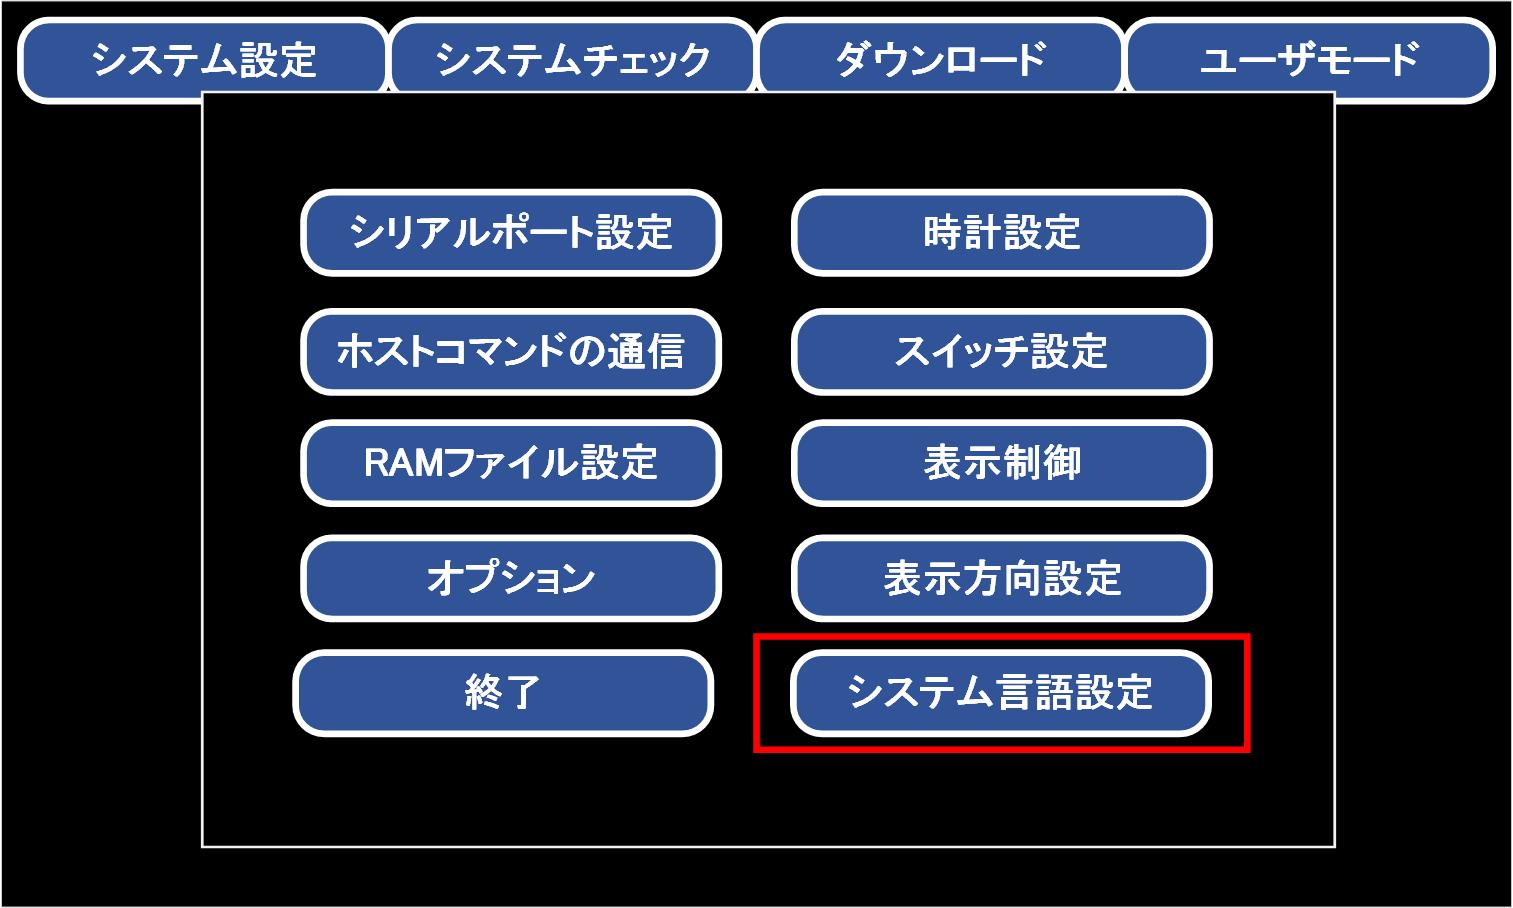
3.Touch the red square button in the system menu.
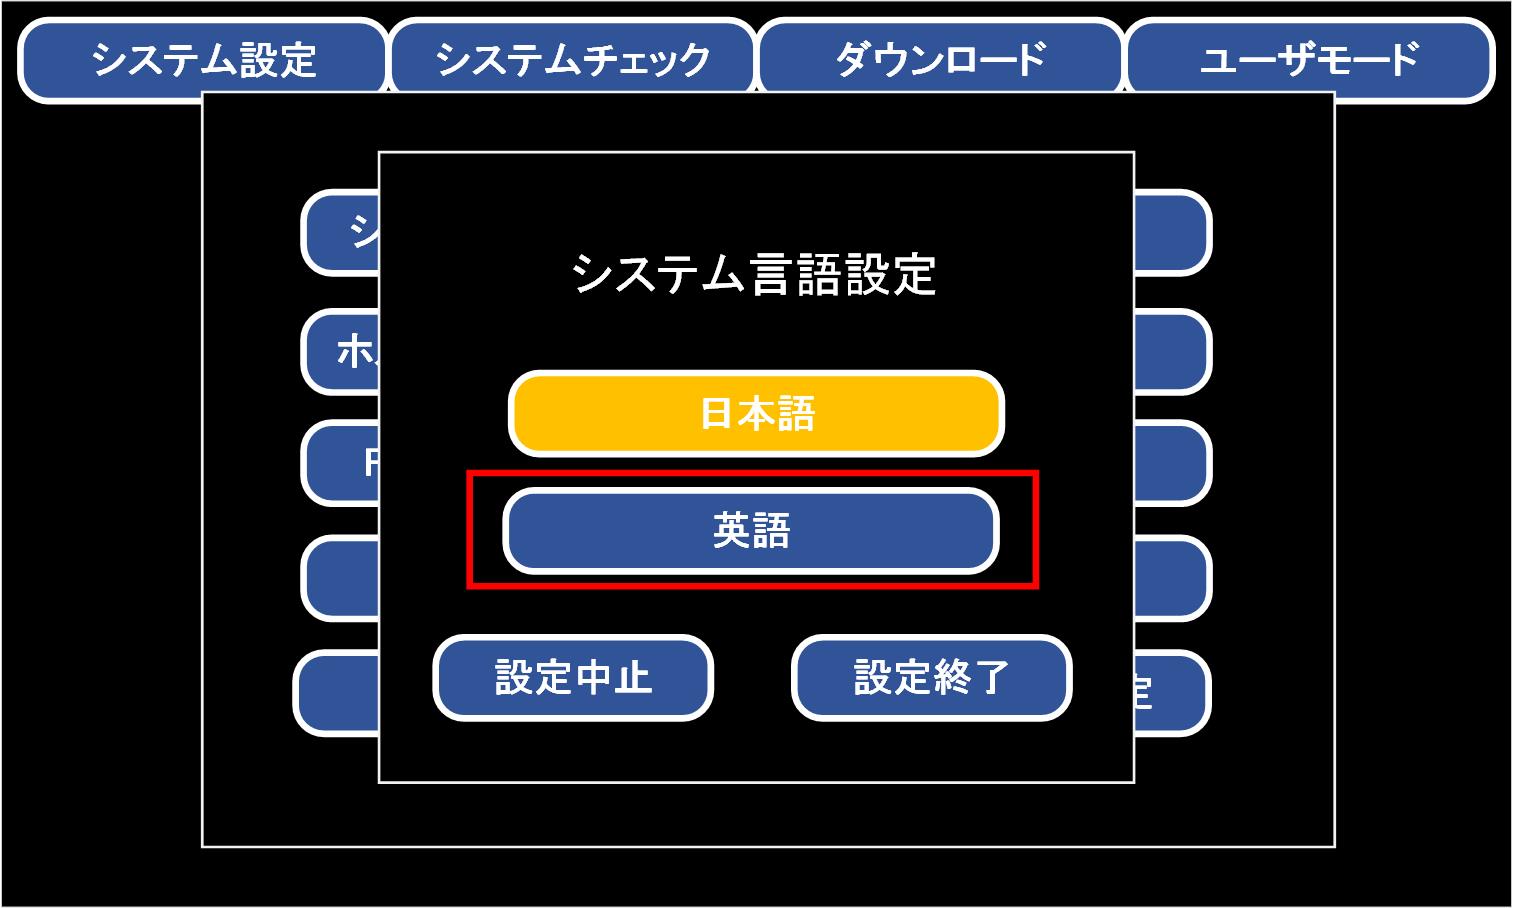
4.Touch the “ENT” button to switch the language display from Japanese to English.
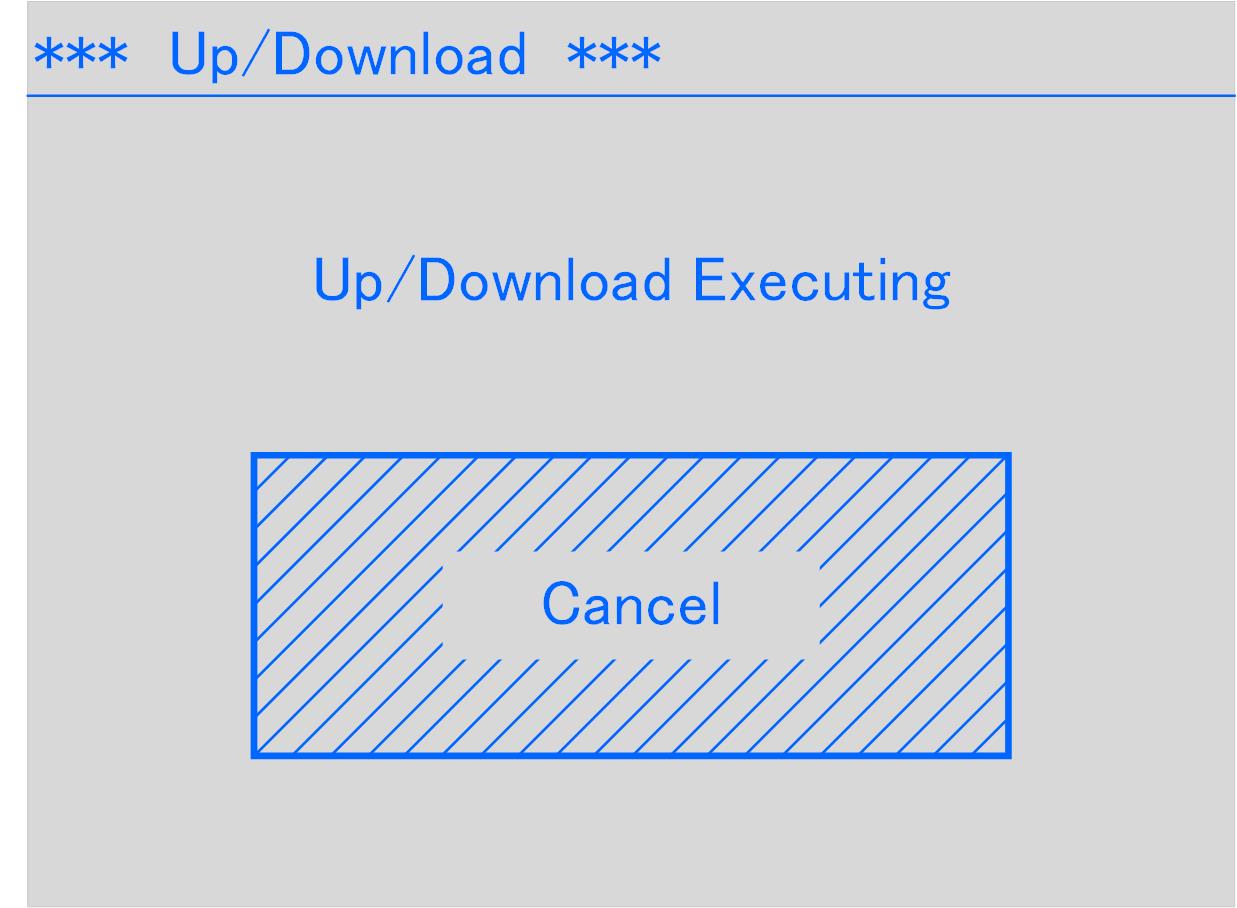
Transfer from USB / SD to display
2.Click “Start” to start downloading the project.
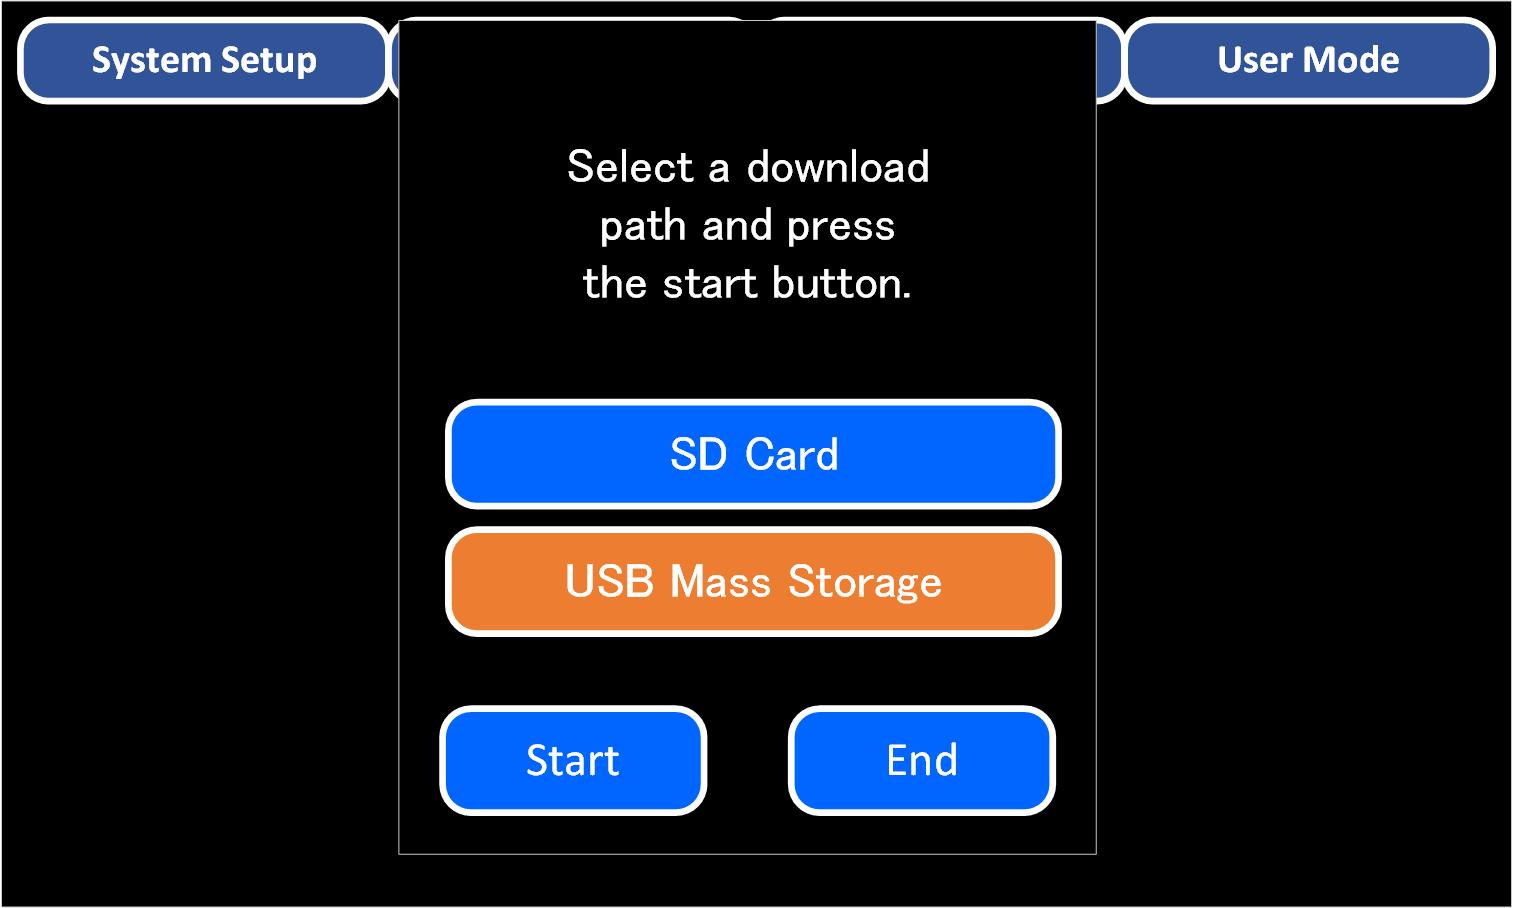
3.When the download is complete, the display will start.
GC-A2 initial setting
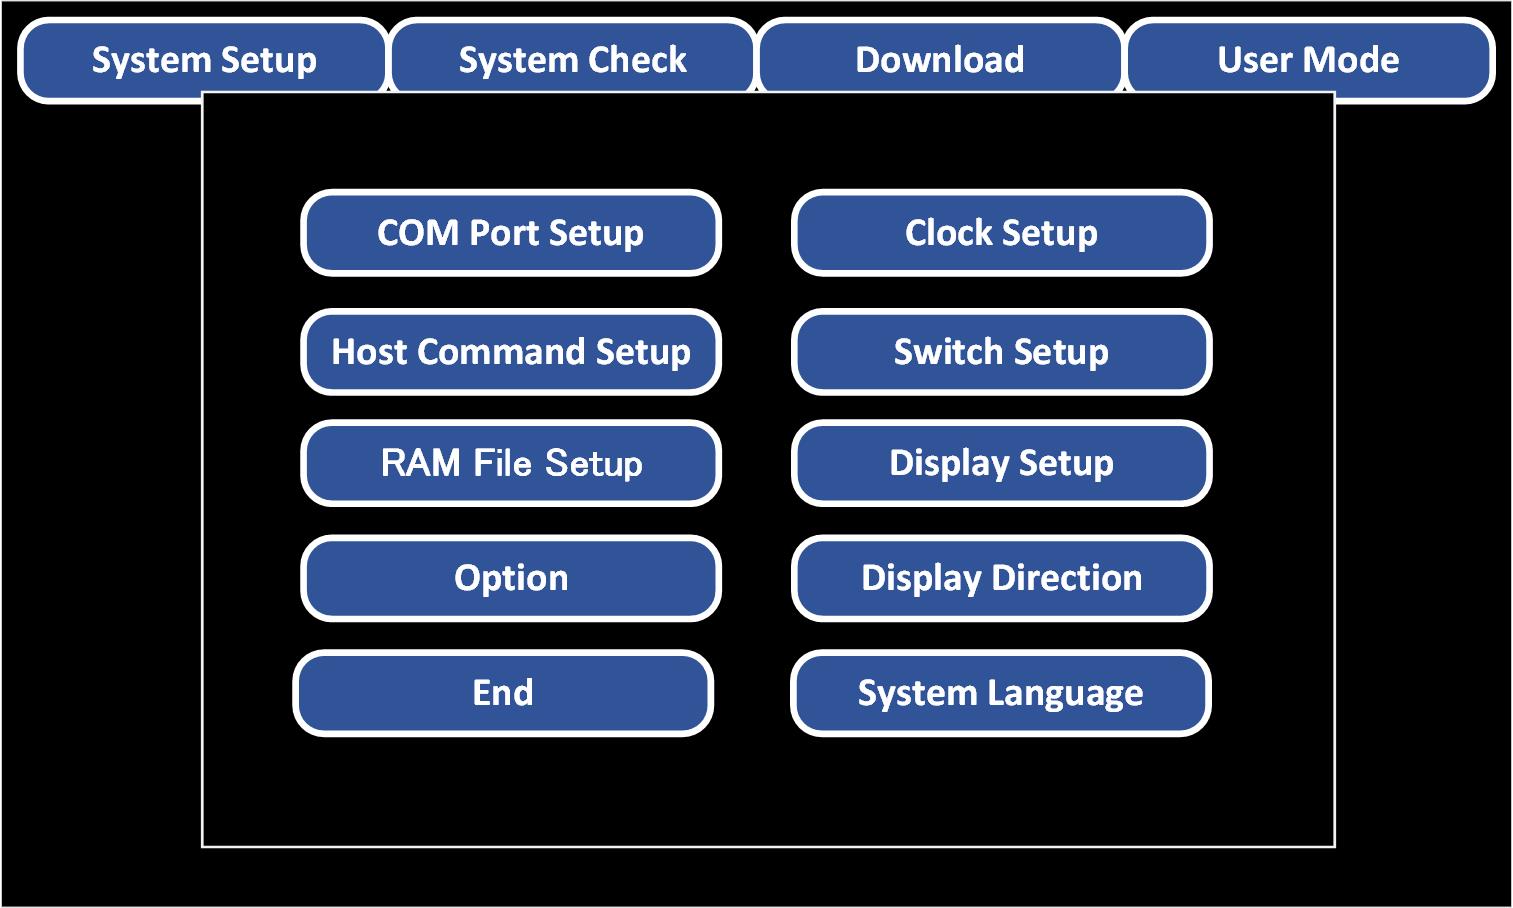
2.After completing the settings, press “User Mode” to start operation as a display.
Inquiry
Click here for email inquiries