
EA7 replace

Question
I am thinking of replacing the EA7 series display.
Please tell me the successor model and the update procedure.

Answer
Successor model: Orders for the GC-A2 Series will end at the end of June 2025.
We regret to inform you that there is no successor model.
Please note that the following explanation is intended for customers who have the GC-A2 Series as a spare part.
The EA7 series has been integrated with the GC-70 series to become the GC-A2 series.
Although the external dimensions and panel cut size are the same, the projects are not completely compatible because the specifications such as panel resolution and drawing tools are different. However, there is a function to load the project for EA7 with Screen Creator Advance 2, a drawing tool for GC-A2x. After that, it may be replaced by modifying or modifying the screen or parts that could not be converted.
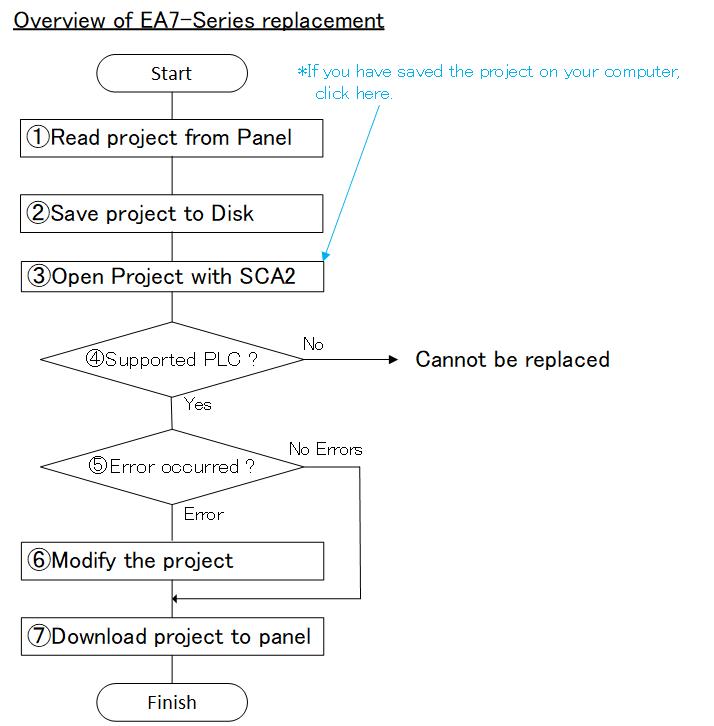
The project migration procedure when using the new drawing software: SCREEN CREATOR ADVANCE 2 (hereinafter referred to as SCA2) is as follows.
For details, please read the explanation below from the model number comparison table.
– Notes –
2.In addition, display restrictions will occur due to changes in screen resolution.
Model number comparison table
| EA7 | Successor GC-A2 | screen size | External dimensions | Panel cutout |
|---|---|---|---|---|
| EA7-S6M-S | GC-A24 * 1 | 7.0 inch wide 800×480 (WVGA) | EA7: 191.0Wx152.0Hx43.1D GC-A2: 204.4Wx156.0Hx54.6D |
No change |
| EA7-S6M-RS | ||||
| EA7-S6C-S | ||||
| EA7-S6C-RS | ||||
| EA7-T6C-S | ||||
| EA7-T6CL-S | ||||
| EA7-T6CL-RS | ||||
| EA7-T8C-S | GC-A26 * 3 | 10.4 inch 800×600 (SVGA) | EA7: 258.5Wx203.4Hx52.1D GC-A2: 299.0Wx209.0Hx70.0D |
EA7: 235.0Wx179.7H GC-A2: 285.0Wx191.0H |
| EA7-T10C-S | EA7: 310.6Wx253.6Hx52.9D GC-A2: 299.0Wx209.0Hx70.0D |
EA7: 290.8Wx221.8H GC-A2: 285.0Wx191.0H |
||
| EA7-T10C-SG | GC-A26 * 2 | 10.4 inch 800×600 (SVGA) | No change | No change |
| EA7-T12C-S | None | |||
| EA7-T15C-S |
* 1: Screen size / resolution and external dimensions are different.
* 2: The screen resolution is different.
* 3: Screen resolution, external dimensions, and panel cut dimensions are different.
Replacement procedure
Upload
1.Connect your computer and EA7 with a commercially available USB cable.
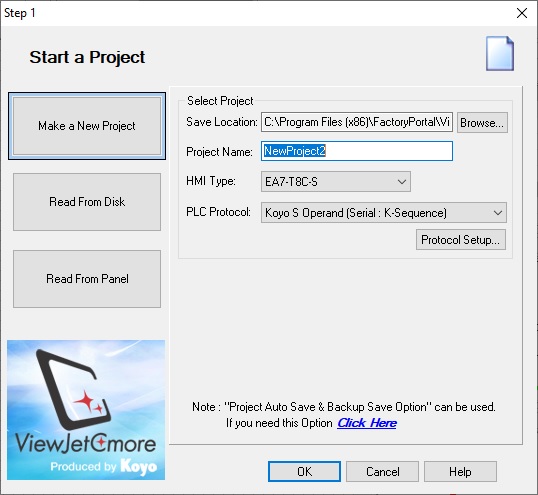
2. Press “Start a Project” in the ViewJet Cmore software (hereinafter referred to as EA-PGMSW).
3.Press “Read from panel”.
4.Confirm that the “USB” indicator in “Connection Setup” is green.
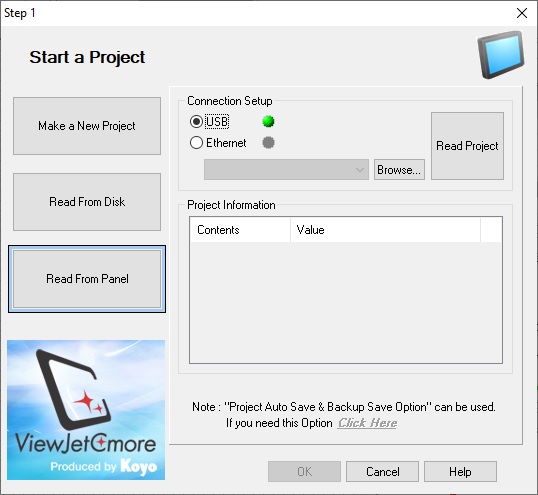
5.Press “Read from panel” to start uploading.
Save the project
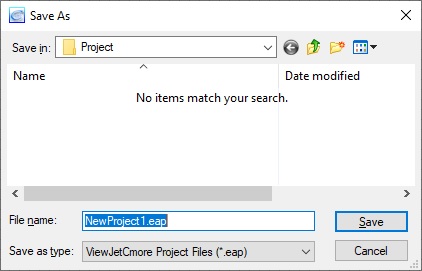
1.Save the project from “File”-> “Save project as”.
New tool: Read with SCA2
1.Start SCA2.
2.From “File”->”Open File”, set “File Type” to “ViewJet Cmore Project File (*.eap)” and select the folder where the EA7 project is saved.

3.Select “* .eap file” in the folder and press “Open” to start the file conversion.
* If the version of the screen data you are trying to open is old, the following errors (E05, E06) may be displayed.
* In that case, open the screen data with EA-PGMSW Ver2.53 or later, overwrite and save the file, and then redo step ③.
* If you need the latest EA-PGMSW, please download it from “Drawing Software” at the bottom of the screen.
Check connected devices
1.Check if the connected device you are using is listed in the SCA2 User’s Manual “Vol.3 PLC / External Device Connection”.
2. If it is not on the list, no further work can be done.
Project modification
1.After the conversion is completed, if any errors occur, correct them.
2.After modification the project, download it to GC-A2.
Download the project to GC-A2
1.Turn on the power of GC-A2.
2.Connect the PC and GC-A2 with a USB cable.
* If you connect for the first time, the device driver will be installed, so wait until the installation is completed.
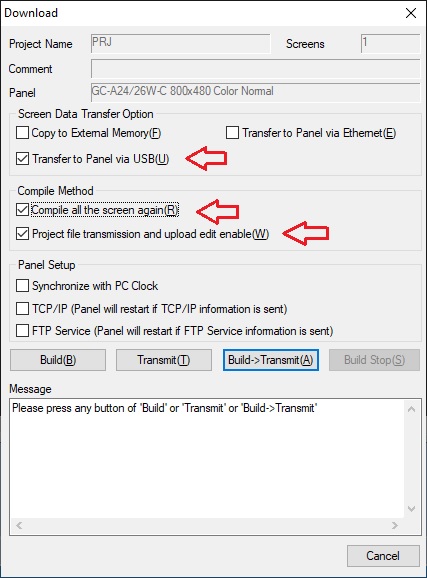
3.Go to SCA2 “Panel”-> “Download”.
4.Check “Transfer to panel via USB”, “Recompile all screens”, “Transfer project and make it recoverable”, and press “Create and transfer”.
EA7-PGMSW Dowdload
Inquiry
Click here for email inquiries