
How to use Auto Tuning

Question
Please tell me how to use the “Auto Tuning” of the servo system setting software KSD-Soft.

Answer
Using KSD-Soft’s “Auto Tuning”, the inertia of the servo system is estimated and the optimized gain parameters are automatically set in the driver.
See below for basic usage.
Basic usage
Start KSD-Soft and connect to the servo system.
Start the “Parameter Editor” and click “Read Parameter” from the icon to read the servo driver parameters.
1. Starting Auto Tuning
Start “Auto Tuning”.
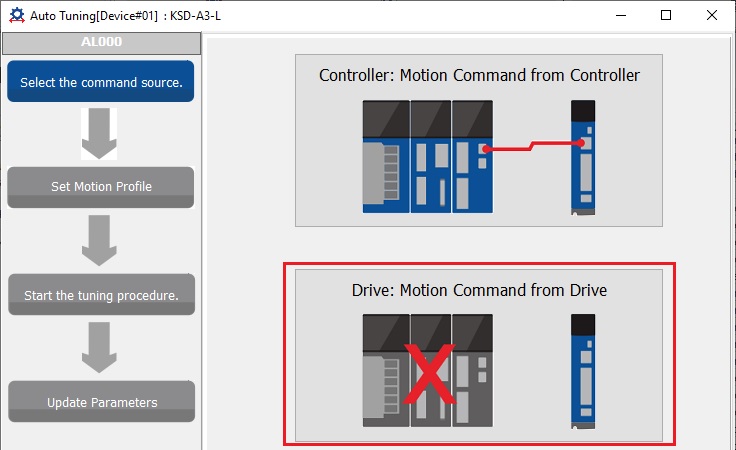
This time, we will introduce an example of “Motion Command from Drive”.
Click “Drive: Motion Command from Drive”.
A confirmation message will be displayed, so please check it.
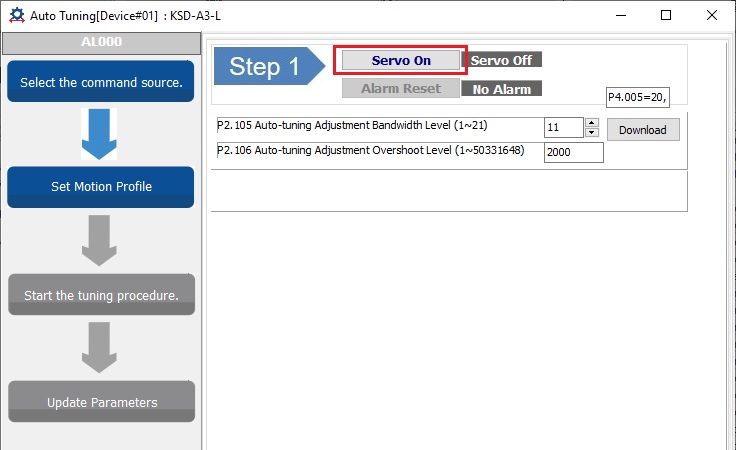
2. Step1: Servo On
Servo turns on.
A confirmation message will be displayed, so please check it.
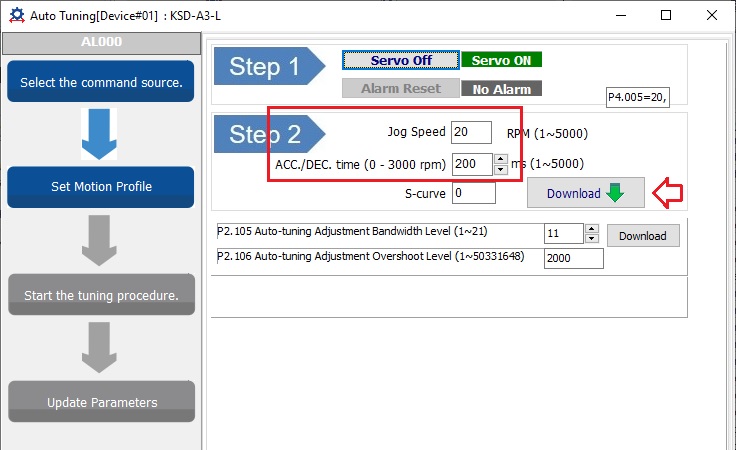
3. Step2: Jog setting of start point / end point of reciprocating motion
Determine the start and end points for the reciprocating motion.
The workpiece will be jogged to the start/end point position, so set the speed/acceleration/deceleration time and click “Write to servo”.
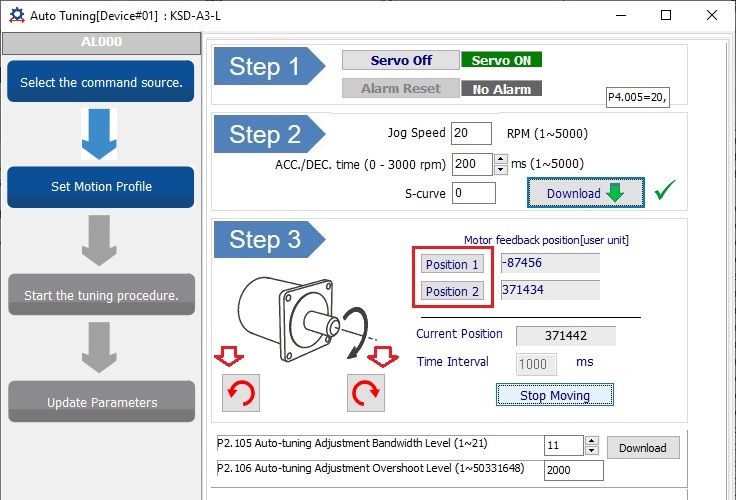
4. Step3-1: Setting the start and end points of reciprocating motion
Click the red arrow button in the reverse direction, move the workpiece to the end of the reverse position, and click “Position 1” to set the starting point.
Click the red arrow button in the forward rotation direction, move the workpiece to the end of the forward rotation position, and click “Position 2” to set the end point.
5. Step3-2: Settings for reciprocating motion
Change the settings to the speed and acceleration / deceleration time for reciprocating motion, and click “Write to servo”.
Make the speed and acceleration / deceleration time close to the settings when actually moving the workpiece.
A speed of 500rpm or higher is recommended.
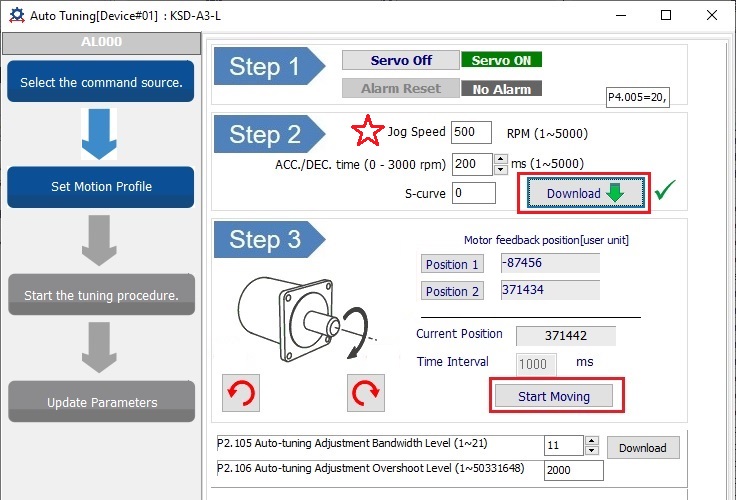
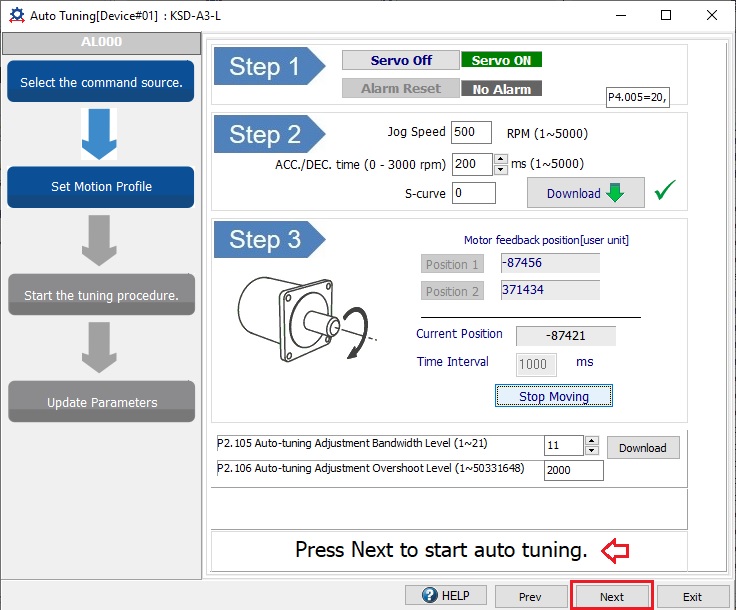
6. Step3-3: Start reciprocating motion
Click “Start moving” to start reciprocating motion.
If there is no problem with the reciprocating motion, click “Next” to start tuning.
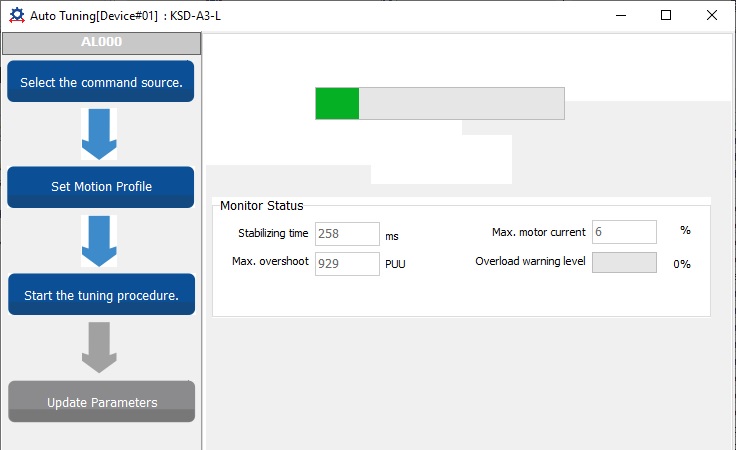
7. Step4: Turing
You can check the tuning progress by checking the percentage value on the progress bar.
8. Step5: Update paratemer
Check the adjusted parameters, and if there are no problems, click “Update” to write the parameters to the servo driver.
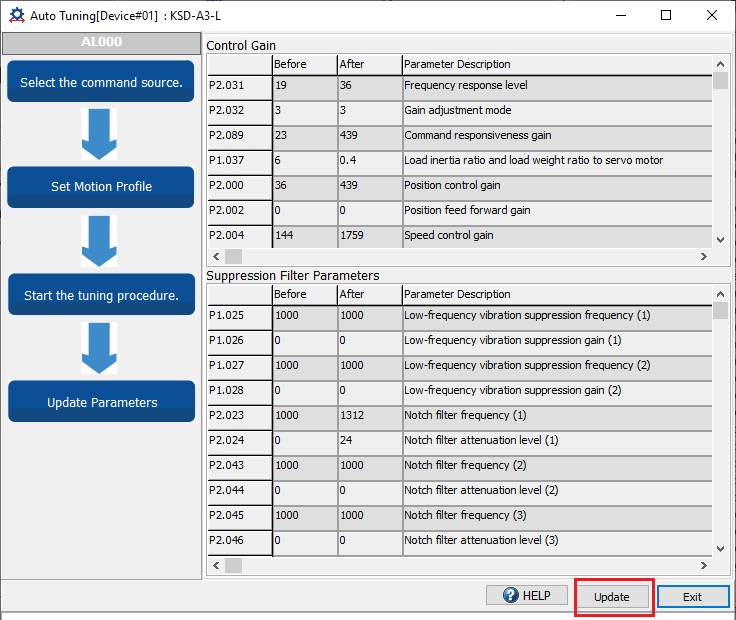
Tuning is now complete.
Gain Turing
If auto tuning is not sufficient, please adjust the gain.
It is easy to do this by selecting “Gain Tuning -> Gain Parameters” from the KSD-Soft menu, entering the speed response frequency in the “Bandwidth” field, calculating the gain, and writing.
Initially, set the frequency response level as low as 10 to 20 and test drive, then gradually increase it and test drive…
The common practice is to repeat this, and when it oscillates, set it smaller, or decide on a “certain level” of servo stiffness.
Inquiry
Click here for inquiries by email